Sometimes you fix some problems on notepad++. Then you need to uninstall it from your computer to reinstall a new version of notepad plus. Learn an easy way to completely remove notepad++ from Window.
How to Uninstall Notepad++ from Windows 7
1. Click your windows computer start button and select the Control Panel. 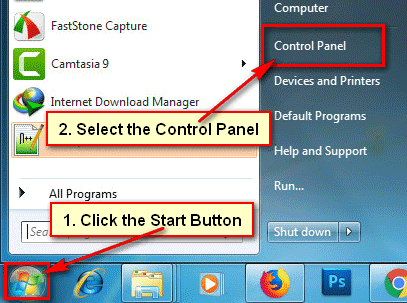
2. Click in front of View by arrow-icon and select Large icons to view large icon on control panel page.
Click the Programs and Features link with CD icon. 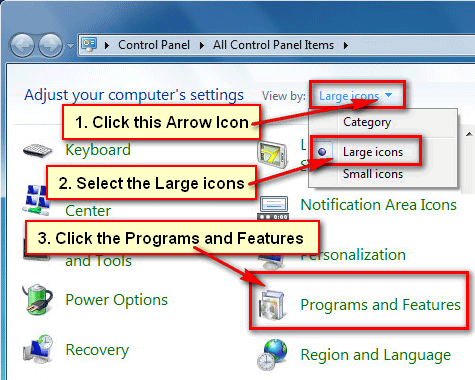
3. Find the Notepad++ software into Uninstall or change a program page and click up to Notepad ++ with list icon to select it.
Click the Uninstall button to uninstall Notepad++ from your computer. 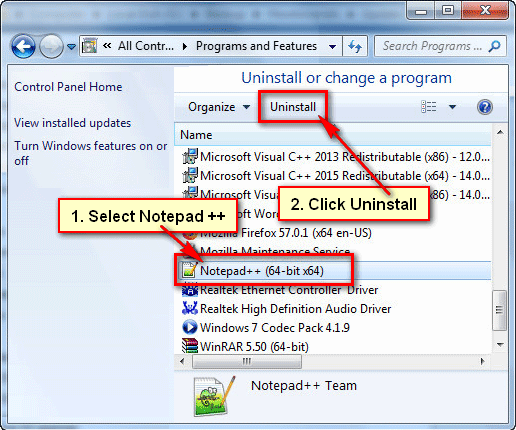
4. Notepad++ uninstall dialog box will open.
Click the Uninstall button to completely remove notepad++ from your computer.
Notepad++ uninstall will start. If you see any message then click the No button.
5. After complete your uninstall, you will see Completed text top of the uninstall progress bar.
Click the Close button to close this window.
You will not see notepad++ software on your programs list. So, using this way you can easily uninstall notepad++ on Windows 7.


