Pen drive is one of the most important storage. You can keep your data on it and you can carry one place to another easily. If you use your name or your company name on your pen drive folder then it looks like more professional. In this article, I will share you 5 easy ways to rename USB drive in Windows.
How to Change the Name of USB Drive
Method 1: Change Removable Drive Name
1. Add your pen drive into your computer or laptop USB port.
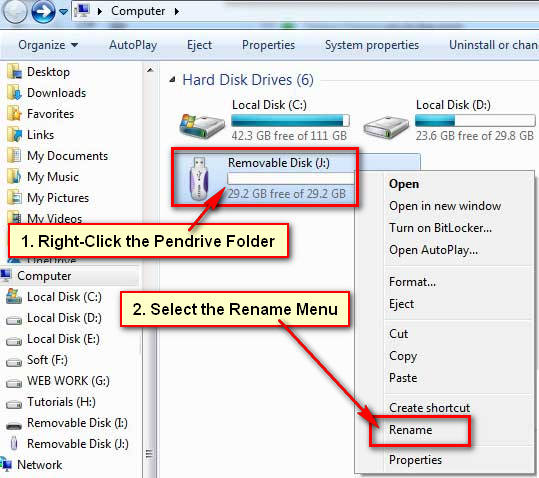
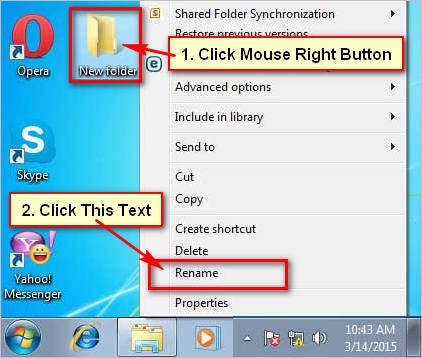
Right-click up to your pen drive folder and select the Rename menu.
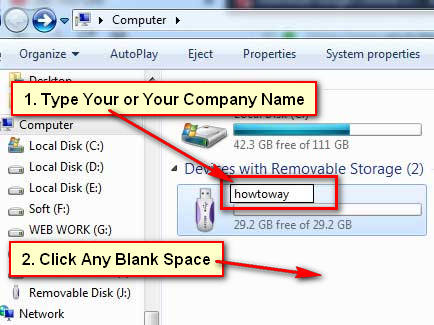
2. Type your or your company name on here.
After complete your type, click any blank space on your screen.
You will see your recently added name on your pen drive.
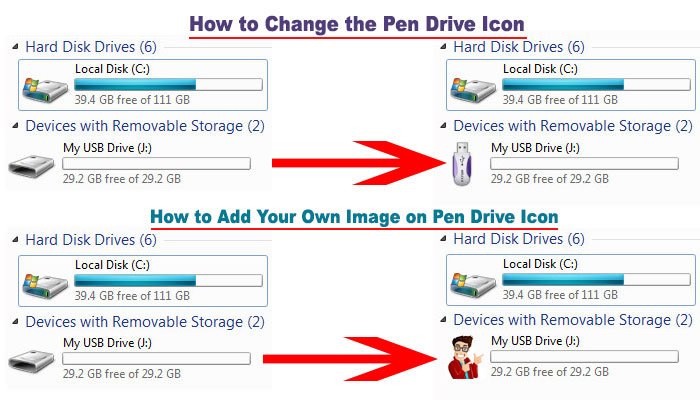
You can also add your company logo on your pen drive icon. If you want to know then follow, how to change pen drive icon in Windows.
Method 2: How to Add My Name on the Pendrive
1. Connect your pen drive into your USB port.
2. Click the mouse right button up to the pen drive folder icon and select the Open menu.
3. Press mouse right button any blank space on this folder, go to the New and select the Text document menu.
4. Double-click up to the new text document to open it.
Type the [autorun] into the first line.
Type the label=your name into the second line.
Click the File menu and select the Save as a sub-menu.
Into the File name box type the AUTORUN.inf text.
From the Save as type section select the All Files option.
Press the Save button to save this file.
5. Disconnect your pen drive from the USB port and connect it again. Then you will see recently added name on your pen drive folder.
Method 3: Change Your Removable Drive Name
1. Right-click up to Computer/My PC with the computer icon and select the Manage menu.
2. From the Storage, section selects the Disk Management option.
You will see all the partition. Click the mouse right button up to your removable drive patriation (its default name is Removable) and select the Properties option.
In the General tab, type the name what you want. Click the Apply and OK button.
Close the Computer Management window.
After that, you will see recently added name on your pen drive folder.
Method 4: Change the Name of USB Using Formatting
1. Connect your pen drive on the USB port.
2. Double click up to My Computer to open it.
3. Press the right-mouse button up to the Removable Disk and select the Format menu.
Warning: Remember that if you format your pen drive then you will lose your pen drive all data. So, keep your pen drive data on your computer before format it.
4. Under the Volume label input the new name for your USB drive. Press the Start button to format your pen drive.
If you see any message then press the OK button.
Wait here a few seconds until for it. After format, the USB drive opens the My Computer folder. Then you will see your USB folder with your selected name.
Remove Name from USB Drive
1. Connect USB drive on PC.
2. Open your My Computer or My PC on your computer screen.
3. Click the pen drive folder, wait a few seconds and click up to your pen drive folder name.
Press the Delete button from your keyboard to remove the name from the USB drive.
Click the blank space on this folder. After that, you will see your folder name will remove.
