The default picture is displayed on your Windows 7 user account. But you can change windows 7 account pictures. You can set your own picture on windows 7. Follow the step by step guide to change windows 7 user account picture or set your own picture on Windows 7 user account.
Table of Content
- Change Windows 7 Account Picture
- How to Set my own Picture on Windows 7 User Account
Change windows 7 account picture
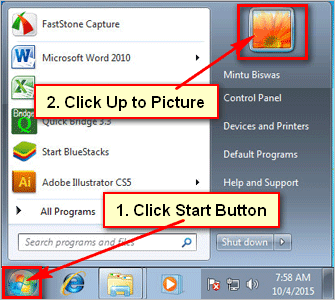
1. Click the Start button and click up to previous user account picture.
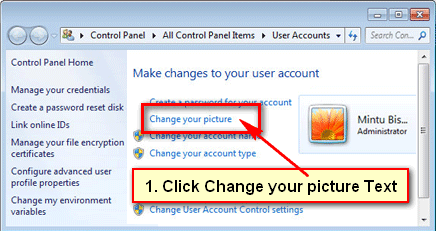
2. You will see User Accounts control page with your name.
Click Change your picture text to change the previous picture.
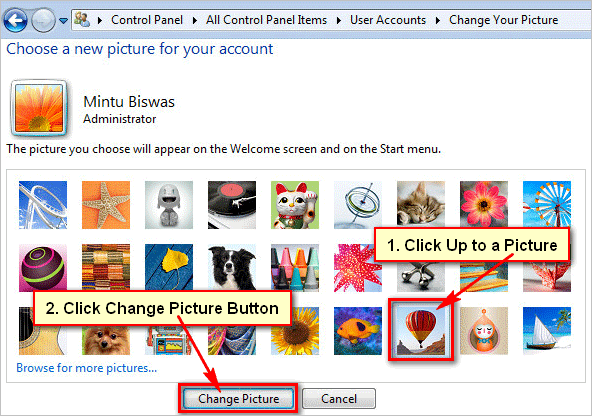
3. You will see few pictures. Click up to a picture from these lists to select it and press Change Picture button to set this picture on your user account.
4. After that, you will see your selected image on Windows 7 profile.
How to set my own picture on windows 7 user account
1. Click up to Start button and click up to picture.
2. Click Change your picture text from user control page to change your previous picture.
3. Click up to Browse for more picture text from Choose a new picture page.
Choose a picture from the computer and click the Open button.
Click up to Change Picture button to set your picture on Windows 7 user account.
