Control panel is one of the most important things in Windows. If you want to change and uninstall your computer program then you need to open your control panel. Anyone can change and uninstall programs from your computer without you. So sometimes you need to disable control panel to protect your computer programs. In this article, I will show you how to disable control penal in Windows 7.
How to Disable Control Panel in Windows 7 for Standard User
1. Press the Start button. Type into the search bar gpedit.msc and select the gpedit.msc program from top of the search window. 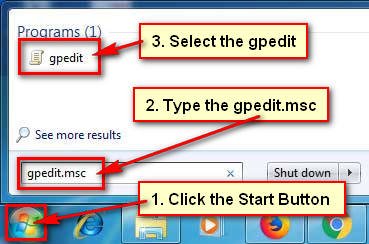
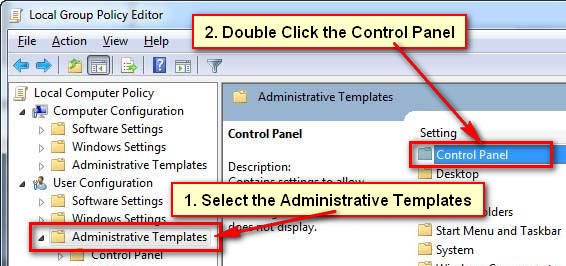
2. Local Group Policy Editor will open. Under the User Configuration section select the Administrative Templates folder.
3. Various options will open on the Control Panel folder.
Double click the Prohibit access to the Control Panel option. 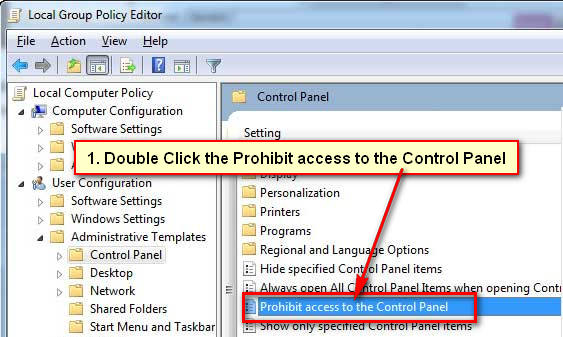
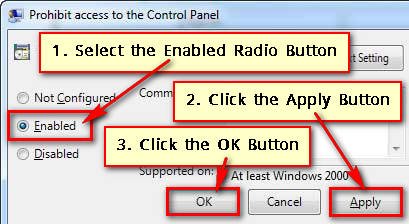
4. You will see a new dialog box with a few options.
- Select the Enabled radio button.
- Press the Apply and OK button to disable control penal in Windows 7.
After that, you will not find the control panel on your start menu. When you want to open control panel using another command then you will see Restrictions message like “This operation has been canceled due to restrictions in effect on this computer. Please contact your system administrator.”
You need to select Not Configured or Disabled radio button to enable the control panel in Windows 7 again.
Hide Control Panel Using Registry Editor
1. Click the start button, type the regedit and hit the Enter button.
2. If you see user account control message then press the OK button.
3. Regedit window will open. Explore the HKEY_CURRENT_USER/Software/Microsoft/Windows/CurrentVersion/Policies/Explores folder from the left of regedit sidebar.
- Right-click the empty space on registry editor, select New and select the DWORD (32-bit) Value.
- Rename the newly created document and rename it NoControlPanel. Open this file and type the value 0 to 1.
