Audio recording is very important on your Windows PC. When you want to record telephone calls, voice record, audio programs record and more. Windows 7 has default sound recorder. It’s free all the versions of windows. You can record any audio using Windows 7 built-in sound recorder. So let’s began with how to record audio on Windows 7 sound recorder.
Record Audio on Windows 7
1. Plug-in a microphone on your computer to record audio.
2. Click the Start button from lower-left on your desktop.
Press the All Programs tab. 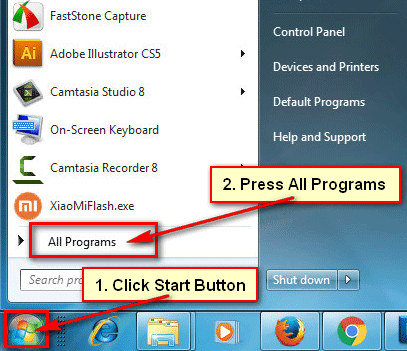
Click the Accessories folder from here to see more options.
Click the Sound Recorder text with a microphone icon. 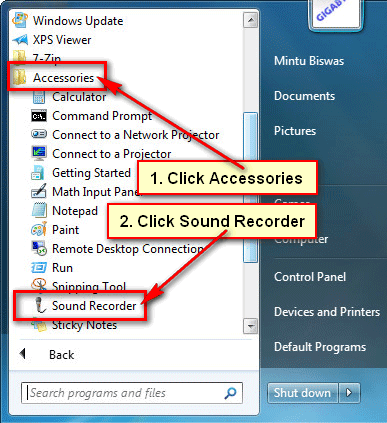
3. Sound recorder window will open. This window is very small and simple. Now you can record audio.
Click on the Start Recording button then your recording will start. Now start speaking to record your voice on your computer. 
4. After complete your recording, press the Stop Recording button.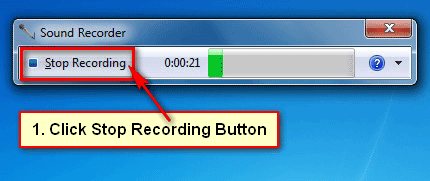
You will see voice recording saving window.
Type this recording file name into File name box.
Press the Save button to save this file on your computer. 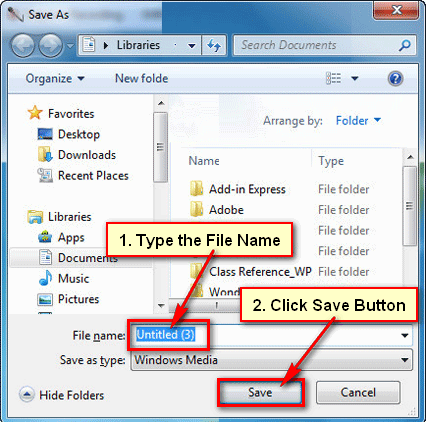
Windows 7 sound recorder is a simple tool which helps you to record your voice just a few clicks.


